Runekeeper Manual
Runekeeper is a Mac app for managing the texture collections (WAD files) used by Quake, Hexen II, Half-Life and their level editors.
Version 1.7.0
Introduction
Overview
Open a .wad file and Runekeeper shows its textures as a grid of thumbnails or as a list, grouped by how the game uses them: solid walls, liquids, skies, animations and transparent textures. You can:
- browse, search and inspect textures, including their mipmaps and the colors they use;
- turn images (PNG, JPEG, TGA and more, or whole folders of them) into textures for the game. Runekeeper converts them to the game's palette, resizes them to valid sizes and generates the mipmaps;
- move textures between WAD files by drag and drop or copy and paste;
- compare a WAD with the maps that use it: which textures they use, which they don't, and which they need from other WADs, and open them in your level editor;
- take the textures out of compiled maps (
.bspfiles) into a WAD; - export textures as PNG images, or a whole WAD as a contact sheet to print, post or put online;
- rename, duplicate, replace and delete textures, with full undo;
- see textures as the game will show them: under the game's light in Quick Look, and a whole WAD brighter with its own gamma;
- find textures the game or editor will reject, such as wrong sizes or invalid names;
- see a WAD's textures in the Finder, as its icon and with Space, without opening it;
- automate it from the Shortcuts app, also as Quick Actions in the Finder.
Runekeeper reads and writes the texture WADs of Quake and Hexen II (the WAD2 format, which both games use) and of Half-Life (WAD3), the kind TrenchBroom and other level editors use; see Quake, Hexen II and Half-Life. Each WAD opens in its own window. Everything you change can be undone, and documents save automatically like other Mac documents.
This manual opens with Help ▸ Runekeeper Manual (⌘?). What's new in each version is in Help ▸ Release Notes, and who Runekeeper owes thanks to in Help ▸ Licenses & Acknowledgements. All three share one window: a link from one to another shows it there, and ⌘[ and ⌘] (or the arrows in the window's toolbar) go back and forward, as in a browser.
Installing and First Launch
Runekeeper runs on Macs with Apple silicon and macOS 15 (Sequoia) or newer.
- Download Runekeeper and open the downloaded
.dmgfile. A window shows Runekeeper and your Applications folder. - Drag Runekeeper onto Applications, then eject the Runekeeper disk in the Finder's sidebar.
- Open Runekeeper from your Applications folder. The first time, macOS asks whether you want to open an app downloaded from the internet: click Open.
From then on, Runekeeper keeps itself up to date (see Updates).
Updates
Runekeeper can update itself. Choose Runekeeper ▸ Check for Updates to look for a new version. When you open Runekeeper for the second time, it asks whether it should check automatically.
When a new version is available, Runekeeper shows what's new and installs it with one click, then restarts.
Update settings
Choose Runekeeper ▸ Settings (⌘,) and click Updates:
- Check for updates automatically: Runekeeper looks for new versions about once a day.
- Download and install updates automatically: new versions are installed without asking, the next time you quit Runekeeper.
- Include beta versions: also get pre-release versions, to try new features early. Off unless you turn it on. Betas come only for larger changes; official releases reach you either way.
- Check Now looks for a new version right away and shows when Runekeeper last checked.

Privacy
Runekeeper only goes online to check for and download updates. When you print, the Mac's print panel looks for printers on your local network; the first time, macOS asks whether Runekeeper may do that, and nothing leaves your network. A check for updates sends nothing about you or your files, only what every download sends: your computer's internet address and the Runekeeper version. Every update is signed, and Runekeeper verifies the signature before installing it.
Quick Start
- Open a WAD: choose File ▸ Open (⌘O), drag a
.wadfile onto the Runekeeper icon, or double-click a.wadfile in the Finder (if Runekeeper is the default app for WAD files). To start a new, empty WAD, choose File ▸ New (⌘N), or File ▸ New WAD For to choose its game. - Browse: click a category in the sidebar, for example Liquids, or type in the search field to filter textures by name.
- Look closer: select a texture and press Space for a large preview. The inspector on the right shows its details.
- Add textures: drag images (or whole folders of them) from the Finder into the window, or choose File ▸ Import Images (⇧⌘I). Check the result in the import sheet and click Import. You can also drag textures between open WADs.
- Check: Needs Attention in the sidebar lists what the game or your level editor would reject, and the inspector says why (see Checks).
- Save: press ⌘S. Your level editor can now use the WAD.
The Window

- Sidebar: the WAD's contents by category.
- Toolbar: the WAD's name, grid or list, thumbnail size and gamma, import and export, the inspector button and search.
- Texture Grid: the textures of the selected category.
- Inspector: details of the selected texture.
- Status Bar: how many items are shown and selected, the size of the WAD file, and its gamma while it isn't 1.00. After textures from another game's WAD came in, it also says how many were converted to this WAD's colors (see Quake, Hexen II and Half-Life).
Sidebar and Categories
The sidebar sorts the WAD's contents into categories and shows how many items are in each. Runekeeper decides the category from the texture's name, just as the game does (see Names and Surface Types).
| Category | Contains | Shortcut |
|---|---|---|
| All Textures | Everything in the WAD | ⌘1 |
| Solid | Ordinary wall, floor and ceiling textures | ⌘2 |
| Liquids | Water, slime, lava and teleporters (names starting with *; see Names for the others) | ⌘3 |
| Sky | Sky textures (names starting with sky) | ⌘4 |
| Animated | Animation frames (names starting with +) | ⌘5 |
| Transparent | Textures with see-through parts (names starting with {); not in Hexen II's WADs, which have none | ⌘6 |
| Random Tiles | In Half-Life's WADs only: variants the game picks from for each surface (names starting with -0 … -9) | ⌘7 |
| Other Lumps | Data that is not a texture, such as the pictures in gfx.wad or a palette | ⌘8 |
| Needs Attention | Textures with a problem (see Checks) | |
| Used | Textures the maps you compare the WAD with use (see Comparing with Maps) | |
| Unused | Textures none of those maps uses | |
| Missing | Textures the maps use that the WAD doesn't have |
Click a category, use its shortcut, or choose it in View ▸ Category. The Maps section lists the maps you compare the WAD with, and its filters once there is one; until then it offers Compare with Maps… (see Comparing with Maps). The bottom of the sidebar shows the game the WAD is for and its file format; click the game to change it (see Quake, Hexen II and Half-Life).
Toolbar
The toolbar runs along the top of the window. From left to right:
- Sidebar button: shows or hides the sidebar, like View ▸ Show/Hide Sidebar (⌃⌘S).
- Title: the WAD's name, how many textures (and other lumps) it contains, and Edited while it has changes that aren't saved yet (see Saving and Versions).
- Grid and list: show the textures as a grid of thumbnails or as a list with details, like View ▸ as Grid (⌃⌘1) and as List (⌃⌘2).
- Thumbnail size: the slider makes the thumbnails in the grid smaller or larger. View ▸ Zoom In (⌘+), Zoom Out (⌘−) and Actual Size (⌘0) do the same. In the list, thumbnails have a fixed size.
- Gamma (the sun): shows this WAD's textures brighter; see Gamma. The sun is highlighted while they are.
- Import (+): turns images into textures, like File ▸ Import Images (⇧⌘I); see Importing Images.
- Export: saves the selected textures as PNG images, like File ▸ Export (⇧⌘E); see Exporting.
- Inspector button: shows or hides the inspector (⌥⌘I).
- Search: type in the search field (⌘F) to show only textures whose names contain the text. Clear the field to see all of them again.
Gamma
The games' textures are dark, and a WAD full of them can be hard to browse. Click the sun in the toolbar, or choose View ▸ Gamma, to show its textures brighter, the way the game's own brightness setting does: with a gamma curve that lifts the dark tones most and keeps white white. 1.00 shows the real colors; lower values are brighter, down to 0.50, as far as the game's menu goes. The reset button (↺) beside the slider returns to 1.00.
The gamma applies wherever Runekeeper shows the WAD's textures: the grid, the list, the inspector and Quick Look. While it isn't 1.00, the sun is highlighted and the status bar says so, so brightened colors aren't taken for the real ones. It is only for viewing: exports, dragged and copied textures, the saved WAD, the checks and the Finder's previews keep the real colors, and contact sheets have a gamma of their own. Runekeeper remembers the gamma for each WAD.
Texture Grid
The middle of the window shows the textures in the selected category. Pixels are shown sharp and unsmoothed, the way the game shows them.
- Selecting: click a texture. ⌘-click adds or removes single textures, ⇧-click selects a range, and you can drag a rectangle around several textures. Choose Edit ▸ Select All (⌘A) to select everything shown.
- Quick Look: double-click a texture, or select it and press Space, to open it in Quick Look.
- Keyboard: the arrow keys move the selection. Type the first letters of a name to jump to that texture.
- Thumbnail size: use the slider in the toolbar.
- Issues: a texture Needs Attention lists has a symbol on its thumbnail's corner: red if the game or a level editor would reject it, orange if it can cause trouble depending on how a map uses it or which other WADs the map loads. Hold the pointer over the symbol to read what's wrong; the inspector shows it too.
- Sorting: View ▸ Sort By sorts by File Order, Name, Dimensions, Surface, Colors or Size (how much room a texture takes in the file), Ascending or Descending. Each window has its own order, and the list uses the same one. Sorting only changes the display; the order of textures in the file stays the same.
- Group Animations: sorted by name, textures are in alphabetical order, so the first frames of all animations come first (
+0basebtn,+0button…), then all second frames. Turn on View ▸ Group Animations to keep each animation's frames together instead:+0basebtn,+1basebtn,+abasebtn, then+0buttonand so on, the normal frames by number, then the triggered ones. A frame numbered beyond 9, such as+10button, appears after+9button, where it was meant to go; the game can't use it, and Needs Attention lists it. The setting applies to every window and is remembered; the other sort orders aren't affected. Contact sheets follow the window's order. - Context menu: Control-click or right-click a texture for Quick Look, Rename, Duplicate, Replace Image, Export, Copy and Delete. With several textures selected it also offers Export Contact Sheet, and, where they apply, Remove Fullbright Pixels from N Textures and Repair N Texture Types, N being how many of the selected textures it concerns.
Texture List
Choose View ▸ as List (⌃⌘2), or click the list button in the toolbar, to see the textures as a list with their details, one row each. View ▸ as Grid (⌃⌘1) goes back to the grid. Your choice applies to every window and is remembered.

The columns, from left to right:
- #: the position in the WAD file. New textures are added at the end.
- Issues: a red symbol for a texture the game or a level editor would reject, an orange one for a texture that can cause trouble depending on how a map uses it or which other WADs the map loads: the same textures Needs Attention lists. Hold the pointer over the symbol to read what's wrong; the inspector shows it too.
- Name: a small thumbnail and the name.
- Dimensions: width and height in pixels.
- Surface: the surface type, such as Liquid, Sky or Animated with the frame number.
- Colors: how many of the palette's 256 colors the texture uses.
- Size: how much room the texture takes in the file, all mip levels included.
Click a column's header to sort by it, and click it again to reverse the order. This is the same order as in View ▸ Sort By, so the grid shows it too; only the Issues column doesn't sort, since Needs Attention already gathers those textures. Drag a column's edge to make it wider or narrower. Everything else works as in the grid: selecting, Quick Look, typing a name, the context menu, editing, and dragging textures to other windows or the Finder.
Inspector
The inspector on the right shows the selected texture. Show or hide it with the toolbar button or View ▸ Show/Hide Inspector (⌥⌘I).
- Preview of the texture.
- Name: click the name to rename the texture.
- Type, dimensions in pixels, and the size on disk including all mipmaps.
- Colors used: how many of the palette's 256 colors appear in the texture.
- Fullbright px: how many pixels use colors that glow in the dark (see Glossary).
- Surface: how the game treats the texture, for example Liquid or Animated (frame 2).
- Used by: while you compare the WAD with maps, which of them use the texture.
- Mip levels: the four stored sizes of the texture. The number under each is its width in pixels.
- Issues: problems found by the checks.

The buttons at the bottom replace the texture's image with another picture (Replace Image…) or save it as a PNG file (Export…).
With several textures selected, the inspector shows how many and their combined size in the file. With none selected, it asks you to select one.
Quick Look
Viewing and Zooming
Select a texture and press Space (or ⌘Y, which works even while you type in the search field) to open a large preview, just like Quick Look in the Finder. It always shows the selected texture of the frontmost WAD window.

- Close button: see below.
- Mip levels: the smaller versions of the texture (see below).
- Tile, Offset and Fullbright: check how the texture repeats and which pixels glow; Light shows it under the game's light, and Background shows a grate or a decal over a wall, or a liquid translucent.
- Zoom: pick or type a size (see below).
- Animation Bar: play, switch between normal and triggered frames, pick a frame.
In Quick Look:
- ← and → go to the previous and next texture; ↑ and ↓ move up and down a row in the grid or list. Below the name, Quick Look shows the texture's size, its type and its position among the textures shown, such as 1 of 17; a name or line too long for the window is shortened in the middle, and pointing at it shows it in full.
- Zoom with the field at the top right: pick a size from its list, such as Fit or 800 %, or type a percentage and press Return. At 100 %, one texture pixel is one point on screen. ⌘+ and ⌘− zoom in and out, and ⌘0 fits the texture to the window. On a trackpad, pinch to zoom.
- The close button (×) at the top left closes the preview and shows the texture's details in the inspector of its WAD window. Space and Esc just close it.
Mip levels
The Mip buttons show the smaller versions of the texture. They are shown at the same size as the original, so you can judge how the texture looks from a distance. The keys 0 to 3 pick a level directly; Texture ▸ Mip Level lists them too.
Liquids, skies and animations can also be played; see Playing Animations, Liquids and Skies.
Tile, Offset and Fullbright
- Tile (T) repeats the texture 3 × 3 so you can check that its edges join seamlessly.
- Offset (O) shifts the texture by half its width and height, so its edges meet in the middle, marked by thin dashed lines. If the texture repeats cleanly, you won't see where they meet; a visible line or jump there is a seam that will show on walls in the game. Fix it in your image editor and bring the new version in with Replace Image. For skies, each layer is shifted on its own.
- Fullbright (F) shows the texture as if in a dark room: everything is dimmed except the fullbright pixels, which glow in the game even in complete darkness. Use it to see whether a light glows where it should, and to find glowing specks that got in by accident. Liquids and skies are always drawn at full brightness in the game, so it isn't available for them. Texture ▸ Remove Fullbright Pixels gets rid of glowing pixels you don't want. Hexen II and Half-Life have no colors that glow, so their WADs don't show it.
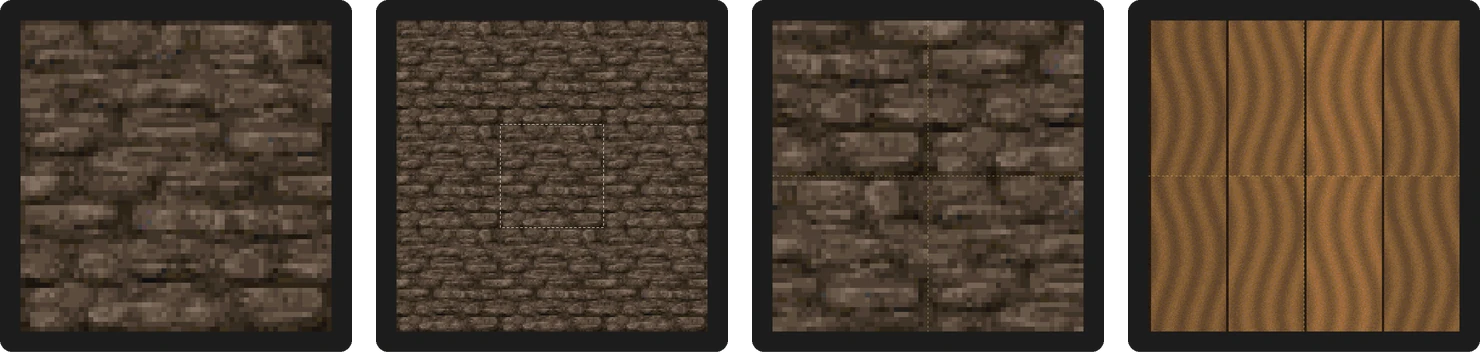
All three also work together, and they are in the Texture menu while Quick Look is open.
Light Preview
A texture can look fine in Runekeeper and fail in the game: details vanish in dim corners, smooth shades turn into visible steps, or something glows that shouldn't. Light (L, or Texture ▸ Light Preview) shows the texture under the game's light before you build a map. A bar appears under the image:
- Modern engines or Software: Modern engines lights the texture smoothly, as today's source ports do. Software lights it the way the original game did, in 64 steps through the palette: in the dark every shade snaps to a palette color, and banding shows.
- Light and its value: the light falling on the surface, from dark (the small sun) to twice the normal light (the large sun). Normal, the small mark in the middle of the slider, shows the texture's stored colors; any other value is the share of normal light, such as 35 %. Pixels that glow in the dark (fullbright) keep their color at any light, as in the game.
- Gamma and its value: the game's brightness setting, the way players turn up their game, on the same scale as the WAD's gamma. It starts at the WAD's own; changing it here is only for the preview and doesn't change the WAD's.
- Reset returns the light to normal and the gamma to the WAD's; the look stays as you chose it.
Skies, and liquids such as water, slime and lava, aren't lit in the game: they show their own colors everywhere, which is why they stand out in dark places. For them the Light slider is dimmed, and the ⓘ next to it says so; Gamma still applies. To see a liquid translucent over a lit floor, use Background.
In Half-Life, the light has one look, as in today's engines, so the switch isn't shown: the game has no software light table. The game brightens a texture's own colors a little as it loads them (its texgamma setting), and the light preview shows that, so Normal looks as in the game; decals and textures starting with { keep their colors, as in the game. Above Normal, bright light makes textures brighter than their stored colors, as Half-Life draws them with its default settings since its 25th anniversary update.
The light preview stays on, with its settings, while you browse with ← and →, so you can look through a whole WAD in the dark, and it remembers them for the next time.

Translucent Liquids (Alpha)
Modern engines can draw water, slime and lava translucent, at a strength the map or the player sets (an engine setting, r_wateralpha, or the map's own wateralpha). For a liquid, Background (B, or A, or Texture ▸ Background) shows it that way, so you can judge how it looks over the floor; for grates and decals the same button shows them over a wall (see Textures over a Wall). The arrow next to it opens its settings, for a liquid with its Alpha:
- Alpha and its value: how opaque the liquid is drawn, from fully translucent on the left to opaque (100 %) on the right, as engines count it. For Quake it starts at 50 %, a common choice in maps; the value you set is remembered for each game.
- Background: what the liquid is seen over: the checkerboard, one of the textures you used last, or Choose Texture…, a searchable list of the solid textures of this WAD and of every other open WAD. Runekeeper remembers it for each WAD, also from another WAD (see Textures over a Wall).
- Background light: the light on the texture behind the liquid, so it is available once a texture is the background. In the game the floor under water is lit, usually dim, while the liquid isn't lit at all, which is why water holds its own over a dark floor. It is the same setting as the light preview's light: moving one moves the other.

- Background turns translucency on and off (B or A); its arrow opens the settings.
- How opaque the liquid is drawn.
- What the liquid is seen over.
- The light on that texture.
*water1 at 70 % over sfloor1_2, as Alpha plays it.Quake's engines draw liquids opaque unless the map or the player asks otherwise, so Background starts off there for liquids. Hexen II draws its two translucent liquids (*rtex078 and *lowlight) at 33 %, so for them Background starts on; in Hexen II a tick on the slider marks those 33 %, which the game also uses for anything else a map draws translucent. It works together with Tile, Play and Offset: the floor is tiled with the liquid, and only the liquid warps or shifts. It stays on while you browse, and the value is remembered for each game.
Textures over a Wall (Background)
A grate, a fence or a decal is only half the picture without the wall behind it. Background (B, or Texture ▸ Background) shows a texture with see-through parts over another texture, as in the game. It is available for textures whose names start with {, for Half-Life's decals, and for liquids, which it shows translucent. The arrow next to it opens its settings, the same as a liquid's without the Alpha slider:
- Background: the checkerboard, one of the textures you used last, or Choose Texture…, which lists the textures a decal can go on: those of this WAD and of every other open WAD, under each WAD's name. Half-Life keeps its decals in
decals.wad, which has no walls, so open the WAD with your walls next to it and pick one there. Runekeeper remembers the background for each WAD, also when it comes from another WAD: that WAD doesn't need to stay open, and Runekeeper finds it again after you move or rename it. Only when the WAD is gone, deleted or in the Trash, or no longer has the texture, the checkerboard shows instead, with a note in the settings. - Background light: the light on the wall and on the texture, since grates and decals take the wall's light in the game. It is the same setting as the light preview's light.

decals.wad on a lab wall of halflife.wad, as Half-Life places it: once.A grate repeats with its wall when you turn on Tile. A decal is placed once in the game, so Quick Look shows it once in the middle of the wall, the wall at its own size and the decal at the same pixel size; Tile repeats the wall 3 × 3 around it, as a wall repeats in a map. Without Background, Tile isn't available for a decal, and Offset never is: a decal isn't repeated, so it has no seams.
Playing Animations, Liquids and Skies
For liquids, skies and animations, a bar under the texture offers what fits its type. For other textures it is hidden, leaving more room for the texture.
- Liquids: for water, slime, lava and teleporter textures (names starting with
*), press P or click Play to see the surface move the way it does in the game. It works together with the mip levels, zoom, Tile and Offset. - Skies: for sky textures, Play shows the sky as you see it in the game: the front layer (the left half, with see-through areas) over the back layer (the right half), both scrolling, the front one faster. Paused, the texture is shown as it is stored, both halves side by side.
- Animations: for animated textures (names starting with
+), the bar also shows the individual frames:- Press P or click Play to play it at game speed. It keeps playing while you browse to other textures, until you pause it, close the preview, or move to a switch, which can't play.
- ⌥← and ⌥→ step through the frames one by one; clicking a frame in the strip shows that frame. The frames in the strip follow the mip level, Offset and Fullbright, so you can compare them as shown.
- Normal and Triggered switch between the normal frames and the frames shown while the surface is triggered, when the animation has both.
- Playing needs at least two frames. A switch with one normal and one triggered frame (
+0…and+a…), which doesn't move in the game, shows a note instead of Play; Normal and Triggered show its two states. - A missing frame appears as a red gap in the strip.
- Random tiles: in a Half-Life WAD, textures whose names start with
-0…-9are variants of one texture. The game picks one of them for each face of a map, by where the face lies, and shows it however often the texture repeats on that face; they don't animate. The bar shows the variants in the strip like an animation's frames, with a note instead of Play; ⌥← and ⌥→ step through them, Tile shows one variant repeated as on a face, and a missing variant appears as a red gap.
Play or Pause and the frame steps are also in the Texture menu while Quick Look is open.

Working with Textures
Importing Images
Runekeeper turns ordinary images into textures in the WAD's game's colors. It reads PNG and JPEG as well as TGA, TIFF, BMP, GIF and HEIC. You can bring images in several ways:
- choose File ▸ Import Images (⇧⌘I) or click + in the toolbar, and pick images, folders or both;
- drag image files or folders from the Finder into the window;
- drag images straight from apps such as Photos or Safari;
- copy an image in another app and paste it into the grid (⌘V).
Compiled maps (.bsp files) come in the same ways; their textures skip the import sheet (see Textures from Maps).
A folder brings in all the images inside it, including those in its subfolders, in the order the Finder shows them: by name, with numbers in their natural order (wall2 before wall10), a folder's own images before those of its subfolders. Other files are left out, and the sheet says how many. If a folder holds no images at all, Runekeeper tells you instead of opening the sheet.
The import sheet
Before anything is added, the import sheet shows each image next to its converted result, so you can see exactly what you'll get.

For each image you can set:
- Name: Runekeeper suggests one from the file name. The counter shows how many of the 15 characters you're using. Start the name with
*,sky,+0or{to get the matching surface type. - Size: textures must be a multiple of 16 pixels wide and high.
- Scale to nearest multiple of 16 resizes the image slightly.
- Crop to multiple of 16 trims the edges instead.
- Keep size keeps the image as it is; it works when its width and height are already multiples of 16.
- Dithering: the palette has only 256 colors. Dithering mixes neighboring pixels to suggest colors in between, which helps with smooth gradients. Choose None for crisp pixel art, Floyd–Steinberg for photos, or Ordered for a regular pattern. Strength controls how much dithering is applied; with None it doesn't apply, and the sheet shows Only with dithering instead.
- Avoid fullbright colors: keeps the conversion away from the colors that glow in the dark. Leave this on unless you want parts of the texture to glow.
- Make transparent areas see-through: shown for images with transparent areas, such as grates, fences or foliage saved as PNG with transparency. It turns the texture into a transparent texture: its name gets a leading
{, and areas that are more than half transparent become see-through in the game. Turn it off to fill transparent areas with black instead.
Settings apply to the selected image. Turn on Use these settings for all images to apply them to every image in the sheet. Images from a folder show the subfolder they came from under their name. To leave an image out, select it and press ⌫, or Control-click it and choose Remove from Import. Click Import to add the textures; they are added at the end of the WAD, in the order of the list. With many images, the sheet shows how far reading and converting have got, and Cancel stops at any time without adding anything. The sheet starts with the defaults you choose in Settings.
Runekeeper picks the closest palette color for each pixel in a way that matches how people perceive color, and it creates the mipmaps automatically. Transparent parts of an image become see-through in transparent textures and black in all others.
In a Half-Life WAD, every texture has 256 colors of its own, so Runekeeper makes a palette for each image from its own colors, which keeps photos and smooth gradients far closer to the original than one game palette can. An image with 256 colors or fewer keeps them exactly. In a transparent texture, the last color is kept for the see-through parts and shows as blue in level editors, as in Half-Life's own textures.
When a name is already taken
If an incoming texture has the same name as one already in the WAD, Runekeeper asks what to do:
- Replace the existing texture;
- Keep Both, which gives the new texture a numbered name such as
brick_1; - Skip the new texture.
When several names clash, you can apply your choice to all of them at once.

Editing
- Rename: select one texture and press Return, choose Texture ▸ Rename, or click its name in the inspector. Press Return again to confirm, or Esc to cancel.
- Duplicate: Edit ▸ Duplicate (⌘D) makes copies with numbered names.
- Delete: press ⌫ or ⌘⌫. There is no confirmation because you can always undo.
- Cut, Copy, Paste: ⌘X, ⌘C and ⌘V work within a WAD and between WADs.
- Replace Image: Texture ▸ Replace Image (⌥⌘R) swaps a texture's pixels for an image file and keeps its name. The image goes through the same import sheet, so you can adjust size and dithering.
- Remove Fullbright Pixels: Texture ▸ Remove Fullbright Pixels turns the pixels of the selected textures that glow in the dark (see Fullbright) into the closest ordinary colors, in all mip levels; all other pixels stay as they are. It works on several textures at once and skips liquids and skies, which the game draws at full brightness anyway. For textures with such pixels, the context menu offers it too. Quick Look's Fullbright view shows beforehand what will change.
- Undo and Redo: every change can be undone with ⌘Z and redone with ⇧⌘Z. The Edit menu says what will be undone, for example “Undo Import 3 Textures”.
- Repair Texture Types: Texture ▸ Repair Selected Texture Types fixes the selected textures stored with the wrong type (see Checks), and Repair All Texture Types fixes all of them in the WAD. For selected textures with this problem, the context menu offers it too. Until then, Runekeeper keeps their type when you rename them or remove fullbright pixels, so the file never changes behind your back; Replace Image stores the new image under the right type.
Saving and Versions
Runekeeper saves like other Mac apps: press ⌘S when you want to, and macOS saves by itself in between. While a window has changes that aren't saved yet, its title says Edited. Runekeeper only changes what you change: textures you didn't touch are written back exactly as they were.
- Earlier versions: File ▸ Revert To goes back to the last saved version, or to any earlier one with Browse All Versions.
- A copy: File ▸ Duplicate (⇧⌘S) makes a copy to save under a new name; the original stays as it is.
Changed by another app
When another app changes a WAD that is open in Runekeeper, the window shows the new content by itself. If the window has changes that aren't saved yet, macOS asks when it next saves, as in other Mac apps:
- Save Anyway saves your version;
- Revert shows the other app's version instead;
- Save As saves your version as a new file and leaves the other app's where it is.
After Save Anyway or Revert, the version you didn't keep is still in File ▸ Revert To ▸ Browse All Versions.
On a USB stick or a network share there is one limit. If a tool rewrites the WAD while your window has unsaved changes, choose Save As to keep your version; Save Anyway may then keep only the textures you changed or looked at.
Moving Between WADs
Drag textures from one WAD window into another to copy them. You can also use Copy (⌘C) and Paste (⌘V). Textures are copied exactly, pixel for pixel, with their names and mipmaps, and are added at the end of the WAD.
Into a Half-Life WAD, a texture from Quake or Hexen II keeps every pixel and takes its game's 256 colors along as its own, so nothing changes. Out of a Half-Life WAD, a texture is converted from its own colors to those of the game it goes into.
Between WADs of different games, Quake and Hexen II, the textures are converted to the colors of the WAD they go into, in one step you can undo, and the status bar says how many were converted. The same happens when textures come from another game's map or are added from Missing.
Copied textures can also be pasted into image editors and other apps as pictures, up to 64 at a time. To get more of them out as PNG files, drag them to the Finder or use Export.
Exporting
Drag textures from the grid or list to the Finder or the desktop to save them as PNG images named after the texture. The see-through parts of transparent textures stay transparent in the PNG, so they import back the same way.
To export to a folder, select one or more textures and choose File ▸ Export (⇧⌘E), Texture ▸ Export Selected, or the export button in the toolbar. Then choose a folder. Turn on Also export mip levels 1–3 to also save the smaller versions as name_mip1.png, name_mip2.png and name_mip3.png. Existing files are never overwritten; Runekeeper adds a number to the new file's name instead. A large export shows its progress; Cancel stops it, and the files already written stay. If a texture can't be written, Runekeeper says which one and why. A window runs one export at a time, textures or a contact sheet; the export commands are available again when it is done.

Contact Sheets and Printing
A contact sheet shows a WAD's textures at a glance: to post in a forum or on Discord, to print, or to put on a website. Choose File ▸ Export Contact Sheet, or, with several textures selected, Export Contact Sheet in the context menu. The preview on the left shows the result as you change the options; the arrows below it page through it.

quake.wad on the left, the options on the right.- Format: PDF is one document with every page, to print or browse; the texture names in it can be searched. PNG saves every page as an image, to post; several pages are numbered (
quake contact sheet 1.png, …). HTML saves a folder with a web page (index.html) and the textures as PNG files, to put online. On the page, a click on a texture shows it large, and Auto, Light and Dark switch its appearance; Auto follows the viewer's system. - Textures: all textures in the WAD, the ones shown in the window (with the category and search you chose), or the selected ones. They are grouped like the sidebar, in the window's sort order. Transparent textures show a checkerboard behind their see-through parts. Other lumps are left out.
- Tile size: Small fits more textures on a page, Large shows more detail, Medium is in between.
- Appearance (PDF and PNG): light or dark pages. The web page has its own switch.
- Paper size (PDF and PNG): A4 or US Letter. The first time, the paper your Mac prints on is chosen.
- Gamma: brightens the textures the way a WAD's gamma does, from 1.00 at the left end, the real colors, to 0.50 at the right. With Automatic, Runekeeper picks the value from how dark the chosen textures are: id's very dark textures get the most, brighter ones less. A PDF and a print start with Automatic, since textures look darker still on paper; PNG pages and the web page start at 1.00, since they are looked at on screens. A value you set is remembered for the WAD, separately for paper and for screens.
- Tile backgrounds: a square behind each texture keeps textures of different sizes in an even grid. Turn it off to place the textures straight on the page.
- Header and footer (PDF and PNG): the WAD's name at the top of every page after the first, and its name, the date and the page number at the foot. The first page always begins with the WAD's icon, name and counts.
Click Export… and choose a name and a place; the name is taken from the WAD, for example quake contact sheet.pdf. A large WAD takes a moment: a progress bar appears, and Cancel stops the export without leaving anything behind. Runekeeper remembers the options for the next contact sheet. Every contact sheet notes that it was made with Runekeeper, with a link to its website.
Printing
Choose File ▸ Print (⌘P) to print a WAD's textures as a contact sheet. The same sheet opens, titled Print, with the same choices except the format, the appearance and the tile backgrounds: printed pages are light, with the textures straight on the page. The other choices are shared with the export, and Gamma starts at Automatic, as for a PDF. Click Print… and the Mac's print panel appears with its own preview of every page, where you choose the printer, the copies and the pages. A large WAD takes a moment to prepare, with a progress bar and Cancel, as for an export.
Checks (Needs Attention)
Runekeeper checks every texture for problems that would stop the game or editor from using it. Textures with problems appear under Needs Attention in the sidebar, and the inspector lists the problems for the selected texture. A large WAD, or many textures added at once, is checked in the background: the list fills in a moment after they appear.

| Problem | Why it matters | How to fix it |
|---|---|---|
| Size is not a multiple of 16 | The game refuses to load the texture. | Use Replace Image and choose Scale or Crop. |
| Name is empty, too long or has invalid characters | The name must fit in 15 plain characters. | Rename the texture. |
| Another texture has the same name | Maps refer to textures by name, so only one of them can be used. | Rename or delete one of them. |
| Sky texture is not 256 × 128 | The game expects skies in this size. | Replace the image with one of the right size. |
Name starts with + (or, in Half-Life, -) but has no frame number | Animation frames are numbered +0 to +9 and +a to +j, Half-Life's random tiles -0 to -9 and -a to -j. A map that uses such a texture stops loading in the game. | Rename the texture. |
| Incomplete animation: missing frames, more than 10 frames, or frame names that aren't spelled exactly alike (including upper- and lowercase); in Half-Life, an animation and random tiles of the same name, which the game joins into one | A map that uses an incomplete animation stops loading in the game, unless another WAD of the map provides the missing frames. | Add or rename frames to complete the animation, or don't use these textures. |
| Frames of an animation have different sizes | The frames look stretched in the game. | Use Replace Image so all frames have the size of the first. |
| Texture stored with wrong type (0x43) | Some tools store textures under the type Half-Life uses. Level editors and compilers may ignore these textures. | Texture ▸ Repair Selected Texture Types, or Repair All Texture Types for every such texture in the WAD; also in the context menu. The textures themselves stay unchanged. |
| Texture contains fullbright pixels (note; not for liquids and skies, which the game draws unlit anyway) | These pixels glow even in complete darkness. Often intended, for example on lights and computer panels. | Nothing, if intended. Otherwise Texture ▸ Remove Fullbright Pixels (also in the context menu) turns them into the closest ordinary colors, or replace the image with Avoid fullbright colors turned on. Fullbright in Quick Look shows where they are. |
Problems marked as a note appear only in the inspector, not under Needs Attention, because they are often intended.
Maps
Textures from Maps
A compiled map of Quake, Hexen II or Half-Life (a .bsp file) carries a copy of every texture it uses, or of those its compiler was told to put in. Runekeeper can take them out, which helps when you have a map but not the WAD it was built with. It reads maps of any size, classic or BSP2, and Half-Life's, whose textures keep their own colors.
- A new WAD from a map: choose File ▸ New from BSP and pick one or more maps. A new, untitled window opens with their textures, a WAD for the maps' game; save it under a name of your choice. The map itself is never changed.
- Into an open WAD: pick maps in File ▸ Import Images, drag them from the Finder into the window, or copy them in the Finder and paste them. Their textures are added at the end of the WAD right away, without the import sheet: they are in their game's palette already, and a map of the other game is converted to the WAD's colors. If a name is already taken, Runekeeper asks as for images. Maps and images can come in together; the images go to the import sheet afterwards.
A texture that several of the chosen maps share comes in once. Some maps don't carry all their textures but only name them, for example when the compiler was told to leave a WAD's textures out. Runekeeper then tells you which textures it couldn't add, so you know which WAD to look for, and it also tells you when a map has damaged textures that it left out. Half-Life's maps often carry few or none of their textures, since its compilers leave a WAD's textures out unless told otherwise. For a map of a game Runekeeper doesn't read, such as Quake 2, it tells you which game the map is from.
As with any change, ⌘Z takes the added textures out again.
Comparing with Maps
Compare a WAD with the maps that use it to see which of its textures they use, which they don't, and which they need but the WAD doesn't have. Choose File ▸ Compare with Maps, or click + next to Maps in the sidebar, and pick one or more maps: the editor's map files (.map, the files your level editor saves, the ones you work on; for Half-Life also Hammer's .rmf) or compiled maps (.bsp). Hammer keeps the list of a map's WADs in its own settings, not in the .rmf, so Runekeeper can't open a .rmf's WADs for you. A WAD often serves several maps, such as the levels of an episode, so you can compare it with all of them at once. Comparing never changes the WAD or the maps.
The sidebar's Maps section lists the maps, with their filters below. Each filter says at the top what it shows, such as how many of the WAD's textures the maps use:
- Used shows the textures at least one of the maps uses. A map that uses one frame of an animation uses all of them, because the compiler copies the whole animation into the map.
- Unused shows the textures none of the maps uses. To slim the WAD down, choose Unused, select all (⌘A) and delete them; ⌘Z brings them back.
- Missing shows the textures the maps use that the WAD doesn't have; see Missing Textures.
Textures the compiler handles itself, such as clip and skip, count like any other: the game never shows them, but your editor does. The inspector names the maps that use the selected texture.
Runekeeper remembers the maps for each WAD and watches them: as soon as you save a map in the editor or compile it again, the lists are up to date, even while Runekeeper stays in the background next to the editor. Hold the pointer on a map in the sidebar to read how many textures it uses and which WADs it lists.
To stop comparing with a map, click its ✕ button or use its context menu. File ▸ Stop Comparing with All Maps stops comparing with every map at once (with one map, it reads Stop Comparing with the Map).
A WAD with only what the maps use: File ▸ New WAD with Used Textures opens a new, untitled window with the used textures, exactly as they are in this WAD. Handy for releasing a map with a small WAD of its own.
Opening a map in your editor
Double-click a .map file in the sidebar to open it in your level editor, or Control-click it: the context menu names the editor, as in Open in TrenchBroom, and can also show the map in the Finder. Runekeeper uses the app the Finder opens map files with. If the Finder would only open them as plain text, Runekeeper asks once which app to use (Open in Editor…) and remembers your answer; Settings ▸ Maps changes it.

Missing Textures
While you compare a WAD with maps, Missing in the sidebar shows the textures the maps use that the WAD doesn't have, as thumbnails, grouped by the other open WAD that has them. Hold the pointer on one to see which maps use it. Textures from a WAD of the other game are shown in this WAD's colors, as they will be added.

base.wad, opened with Open Listed WADs, has two of the textures the map needs.- Copying them into this WAD: double-click a texture, select several (⌘-click) and click Add Selected to This WAD or press Return, click Add to This WAD next to a WAD's name for all of its textures, or Add All Found to This WAD at the top. As with any change, ⌘Z takes them out again.
- Textures no open WAD has come next, as empty frames.
- The WADs the maps list come at the end: each shows whether it's open, the folder Runekeeper found it in, with Open, or Locate… when it wasn't found; see A Map's WADs. Hold the pointer on one to see the path as the map writes it. After a WAD opens, Missing scrolls back to this list, and its textures appear above.
Click a section's name to fold or unfold it.
A Map's WADs
A map lists the WADs it was built with. File ▸ Open Listed WADs, or Open Listed WADs in Missing, opens those that aren't open yet; then Missing shows which of them has each missing texture.
Runekeeper follows a path relative to the map, such as ..\wads\base.wad. Maps often name their WADs with paths from the mapper's own computer, so Runekeeper also looks for them by name: next to the map and in the folders above it, then in the game folder set in Settings ▸ Maps and its subfolders. If it still can't find one, it asks you where it is and remembers your answer. A file with another name, such as quake.wad for quake101.wad, opens just this once, and the WAD still counts as not found.
Finder and Shortcuts
WADs in the Finder
In the Finder's icon and gallery views, a WAD shows its textures instead of the document icon: four of them in a square, or one if it has fewer than four. Runekeeper prefers square textures, one of each surface type if there are any — a solid one, a liquid, an animation and a transparent one — and never skies.
The document icon stays for small icons and the list view, for WADs with nothing to show (only skies, or only other lumps such as Quake's gfx.wad), for damaged files, and for .wad files of other games such as Doom.

gfx.wad, which holds no textures.Select a WAD in the Finder and press Space to look inside without opening it: its textures grouped like the sidebar's categories, each with its name and size, and the other lumps at the end. The top shows how many textures there are and of which surface types; if some need attention, it says how many, and those textures carry an orange mark — open the WAD to see what's wrong (see Checks). The same view appears in the Finder's preview pane. A damaged WAD says so instead; for .wad files of other games the Finder shows its usual preview.

quake.wad in the Finder: the counts at the top, then every texture, grouped by kind.In column view, where the Finder shows a preview next to the columns, a WAD gets a compact card instead: its four textures large, then its name, how many textures it has and how big it is, the categories, and how many need attention. Widen the preview column and the textures appear as tiles.
This works once Runekeeper is in your Applications folder and has been opened once. To turn it off, open System Settings ▸ General ▸ Login Items & Extensions, find Runekeeper under Extensions and turn off Quick Look.
Automating with Shortcuts
Runekeeper adds five actions to the Shortcuts app, so you can build your own workflows without opening a window: search for WAD or Textures in its list of actions. Runekeeper doesn't need to be running; it does the work in the background.
The four actions that take a WAD work on a WAD file on your Mac. To use a WAD another action made, save it first, with Save File or with Make WAD's Save Next to the Source.
- Make WAD from Images: a new WAD from images or folders of images (with their subfolders), converted as the import converts them. Choose the game, or leave it empty for the one set in Settings ▸ General. The size, dithering and fullbright options, when left empty, come from Settings ▸ Import. The WAD is named after the folder or the first image unless you give it a name. Follow it with Save File, or turn on Save Next to the Source to save it beside the first image or folder instead; use one or the other, not both.
- Add Images to WAD: adds images to a WAD and saves it, with the same size, dithering and fullbright options as Make WAD. Existing Names says what happens to an image whose name the WAD already has: Keep Both (the image gets a new name), Replace (the texture gets the new picture) or Skip. If the WAD is open in Runekeeper with unsaved changes, the action stops and says so; without unsaved changes its window shows the added textures by itself.
- Export Textures: a WAD's textures as PNG images, all of them, only those with the names you list, or only those of one category such as Liquids. Follow it with Save File.
- Get Textures of WAD: the WAD's textures in file order, each with its name, width, height, surface type and problems, for the next actions to use.
- Check WAD: what Needs Attention would list, one line per problem; nothing when all is fine, which an If action can test.
A shortcut can also be a Quick Action in the Finder. For example, to turn a folder of images into a WAD next to it with a right-click:
- In the Shortcuts app, choose File ▸ New Shortcut and name it, for example, Make WAD.
- Add the action Make WAD from Images, click its arrow to show the options, and turn on Save Next to the Source.
- Open the shortcut's details (ⓘ), turn on Use as Quick Action and Finder, and let it receive images and folders.
- In the Finder, Control-click a folder of images and choose Quick Actions ▸ Make WAD. The WAD appears next to the folder, named after it.
About Textures
Quake, Hexen II and Half-Life
Runekeeper works with the texture WADs of Quake, of Hexen II and of Half-Life. Quake and Hexen II use the same file format, and a WAD doesn't say which game it is for, so Runekeeper tells by what it holds. When it guesses wrong, the colors look wrong: change the game at the bottom of the sidebar, as described below. The clues are a palette stored in the WAD, the texture names Hexen II's own WADs use, and in which game's colors its textures look right; a compiled map tells by its structure, a map source by settings only Hexen II's maps have.
The bottom of the sidebar shows the game, with (detected) when Runekeeper decided it. To change it, click it, or choose View ▸ Game. Runekeeper remembers your choice for the file; the file itself doesn't change. With the wrong game, the colors look wrong: the textures aren't converted, only shown in the other game's colors. Runekeeper keeps your choice with the file itself, in its metadata, not in its contents, so the WAD stays a standard WAD and the choice goes along when you rename, move or copy it on your Mac; the Finder's icons and Space preview show the WAD as that game too. A WAD that comes from elsewhere, for example in a download, is detected again. File ▸ New makes a WAD for the game set in Settings ▸ General; File ▸ New WAD For ▸ Quake, Hexen II or Half-Life makes one for that game, and File ▸ New from BSP… makes a WAD for the maps' game. A new WAD's game can be switched between Quake and Hexen II later; a Half-Life WAD is a different kind of file and stays Half-Life's.
Hexen II has its own palette, no transparent textures (a name starting with { is an ordinary solid texture) and no colors that glow in the dark, so in its WADs the import sheet, the inspector and Quick Look leave out what concerns fullbright colors. Two of its liquids, those whose names start with *rtex078 or *lowlight, are drawn translucent as a whole, so the inspector, the list and Quick Look call them Liquid, translucent. Its other rules are Quake's, described on the following pages. Textures moved between the games are converted to the other game's colors (see Moving Between WADs).
Half-Life: Runekeeper also opens Half-Life's texture WADs (the WAD3 format), and those of games built on it. There every texture brings its own 256 colors, so a WAD3 needs no detection: it is always Half-Life's. Its textures have no colors that glow in the dark, and Quick Look's light shows the modern look only. Names starting with !, water or laser are liquids like *; names starting with -0 … -9 are random tiles: variants of one texture, of which the game picks one for each face of a map by where the face lies, so a row of panels or a large floor doesn't look the same everywhere. They have a sidebar category of their own, Random Tiles (⌘7), and their variants are checked like an animation's frames. Animations play at 10 frames per second, twice Quake's speed. Half-Life links frames whatever the case of their names, so +0LAB and +1lab belong together there. It also joins an animation and random tiles of the same name, such as +0lab and -0lab, into one set; Needs Attention warns about them.
Decals: Half-Life's bullet holes, blood, scorch marks and sprayed logos are in decals.wad. Most of them are drawn in one color, each pixel only saying how strongly it covers the wall, which looks like a gray ramp in a palette. In a WAD named decals.wad, Runekeeper shows these decals as the game draws them: in their color, over the checkerboard where they are see-through, in the grid, the inspector, Quick Look, the Finder and contact sheets, and exported PNGs keep that transparency. The inspector, the list and Quick Look call them Decal. A decal whose last color is pure blue is drawn like any other transparent texture, as in the game, and is called Transparent. To see a decal on a wall, open the WAD with your walls too and use Background in Quick Look.
A WAD for the other game: File ▸ New WAD Converted To ▸ Hexen II (or Quake, from a Hexen II WAD) opens a new, untitled window with all of the WAD's textures in the other game's colors; the WAD itself stays as it is. Every pixel gets the other palette's nearest color, in every mip level, so hand-made mip levels stay. Some things don't carry over: colors that glow in Quake become ordinary colors in Hexen II, and a texture starting with { becomes solid there, its see-through parts visible. A palette stored in the WAD becomes the other game's, so the new WAD is recognized as that game; other lumps that aren't textures are kept as they are. The conversion is one step you can undo in the new window, and the status bar says how many textures were converted.
Names and Surface Types
Quake decides how to draw a texture from the beginning of its name; Hexen II follows it, except for {, and Half-Life adds a few names of its own (see Quake, Hexen II and Half-Life). Runekeeper uses the same rules for the sidebar categories, the inspector's Surface row and the list's Surface column. Upper- and lowercase letters are treated the same.
| Name starts with | Surface | In the game |
|---|---|---|
+0 … +9 | Animated | Frames of a looping animation, e.g. +0slime, +1slime, … |
+a … +j | Alternate animation | A second set of frames shown when the surface is triggered, e.g. a switch that changes when pressed. |
* | Liquid | The surface warps and is not affected by lighting. Used for water, slime, lava and teleporters, e.g. *water1. |
! | Liquid | The same as * in today's Quake engines (QuakeSpasm, vkQuake, Ironwail), not in the original Quake; in Half-Life too, where names starting with water or laser are liquids as well; in Hexen II a solid texture. |
sky | Sky | A scrolling two-layer sky. |
-0 … -9 | Random tile | Half-Life only: variants of one texture, of which the game picks one for each surface (see Quake, Hexen II and Half-Life). |
{ | Transparent | Some pixels are see-through. Used for grates, fences and foliage. |
| anything else | Solid | An ordinary, lit texture. |
Names can be up to 15 characters long and may contain letters, digits and symbols, but no spaces or accented characters. Within a WAD, every name should be unique.
Animations
Textures whose names start with + and a digit are frames of a looping animation, shown at 5 frames per second (10 in Half-Life). +0slime, +1slime, … play in order. Frames starting with +a, +b, … form an alternate animation that the game shows while the surface is triggered.
An animation can have up to 10 frames (+0 to +9), and up to 10 alternate frames. Its frames must be numbered without gaps, and the rest of their names must match exactly, including upper- and lowercase letters. Runekeeper checks this for you, and you can watch animations in Quick Look.
Liquids
Textures whose names start with * are liquids: water, slime, lava and teleporters (in Half-Life also !, water and laser, see Names and Surface Types). In the game their surface warps in slow waves and is not affected by lighting, so they look the same in dark and bright areas. Quick Look shows the warp, and Background shows a liquid translucent over a floor, as modern engines can draw it.
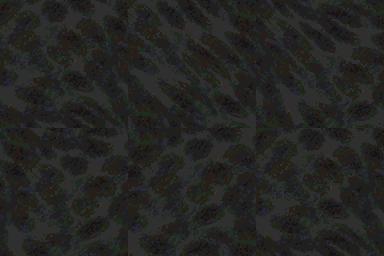
*water0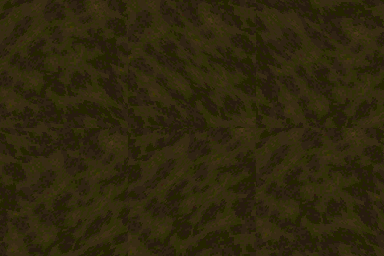
*slime0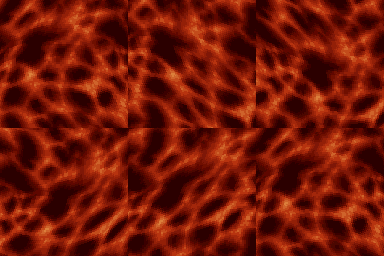
*lava1Skies
Textures whose names start with sky are skies. They are 256 × 128 pixels and hold two layers side by side: the left half is the front layer, in which black is see-through, and the right half is the back layer. In the game both layers scroll across the sky, the front one faster. Quick Look shows them scrolling. In Half-Life a sky texture only marks where the game draws its skybox, six images outside the WAD, so any size will do and nothing scrolls.
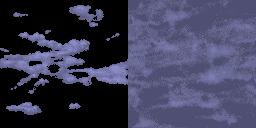
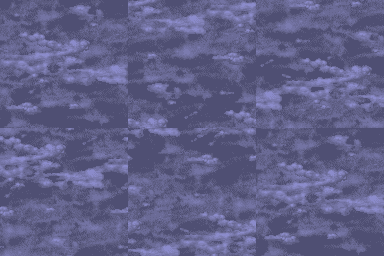
sky4 as stored, and its two layers scrolling at the game's speeds.Transparent Textures
Transparent textures are Quake's and Half-Life's; in Hexen II a name starting with { is an ordinary texture. Textures whose names start with { have see-through parts: pixels using the last palette color (index 255) are not drawn. They are used for grates, fences and foliage. When you import an image with transparent areas, Runekeeper can turn it into a transparent texture (see Importing Images), and exported PNGs keep the transparency. In the inspector and in Quick Look, a checkerboard shows through the see-through parts.

Solid Textures
Textures whose names start with none of the characters above are solid: ordinary walls, floors, ceilings, doors and trims, and usually most of a WAD. In the game they are lit by the map's lighting, so they get darker in shadows and brighter near lights. Colors from the last 32 of the palette are the exception: they ignore lighting and glow even in the dark (see Fullbright in the Glossary), which suits lamps, screens and runes, but looks like glowing specks when used by accident. Runekeeper avoids them when it converts images, and the inspector tells you when a solid texture contains any.
Other Lumps
A WAD file can also hold data that is not a texture, called a lump. Quake's own gfx.wad, for example, contains the status bar pictures and the console font; other WADs may hold a palette. Runekeeper lists these under Other Lumps with their type and size. They are kept exactly as they are, in their original order, when you save.

gfx.wad under Other Lumps, with the console font selected.Reference
Settings
Choose Runekeeper ▸ Settings (⌘,).
- General sets the game File ▸ New makes WADs for (see Quake, Hexen II and Half-Life).
- Import sets the defaults the import sheet starts with: size, dithering and its strength, avoiding fullbright colors, and making transparent areas see-through. The strength can be set even with dithering set to None: the sheet uses it as soon as you choose a dithering method for an image. There you can also limit imported textures to at most 512 pixels on each side.
- Maps is about the maps you compare a WAD with (see Comparing with Maps):
- Game folder: where Runekeeper looks for the WADs a map lists when they aren't next to the map or in the folders above it, usually your Quake or Hexen II folder.
- Level editor: the app a double-click on a
.mapfile opens. Automatic uses the app the Finder opens map files with, named in brackets, or asks once; an app you choose here takes precedence. - WADs found by asking: the WADs you located by hand with Locate… in Missing. Forget makes Runekeeper ask again.
- Updates controls how Runekeeper looks for new versions (see Updates).


Keyboard Shortcuts
| Action | Shortcut |
|---|---|
| Files | |
| New WAD | ⌘N |
| Open | ⌘O |
| Save | ⌘S |
| Duplicate document | ⇧⌘S |
| Import Images | ⇧⌘I |
| Leave an image out of the import sheet | ⌫ |
| Export | ⇧⌘E |
| Print (as a contact sheet) | ⌘P |
| Editing | |
| Undo / Redo | ⌘Z / ⇧⌘Z |
| Cut / Copy / Paste | ⌘X / ⌘C / ⌘V |
| Duplicate textures | ⌘D |
| Delete | ⌫ or ⌘⌫ |
| Rename / cancel a rename | Return / Esc |
| Add the selected missing textures to the WAD | Return |
| Replace Image | ⌥⌘R |
| Select All | ⌘A |
| Search | ⌘F |
| Viewing | |
| Quick Look | Space or ⌘Y |
| Close Quick Look | Space, Esc or ⌘Y |
| Next / previous texture in Quick Look | → / ← |
| Row up / down in Quick Look | ↑ / ↓ |
| Play / pause an animation, liquid or sky in Quick Look | P |
| Mip level in Quick Look | 0 – 3 |
| Tile / Offset / Fullbright in Quick Look | T / O / F |
| Light preview in Quick Look | L |
| Texture over a wall, or a liquid translucent (Background), in Quick Look | B (A for liquids too) |
| Previous / next animation frame in Quick Look | ⌥← / ⌥→ |
| Zoom In / Zoom Out | ⌘+ / ⌘− |
| Fit to window in Quick Look | ⌘0 |
| Actual Size | ⌘0 |
| Show categories | ⌘1 … ⌘8 (Random Tiles, ⌘7, in Half-Life's WADs only) |
| Show as grid / as list | ⌃⌘1 / ⌃⌘2 |
| Show/Hide Sidebar | ⌃⌘S |
| Show/Hide Inspector | ⌥⌘I |
| Settings | ⌘, |
| Manual | |
| Runekeeper Manual | ⌘? |
| Search the manual | ⌘F |
| Next / previous match | Return / ⇧Return |
| Back / forward (manual, release notes, licenses) | ⌘[ / ⌘] |
Glossary
- WAD
- A file that bundles many textures (and sometimes other data). The version Quake and Hexen II use is called WAD2; Half-Life's, WAD3, gives every texture its own colors. Level editors load WADs so you can paint their textures onto brushes, and the map compiler copies the textures into the finished map.
- BSP (compiled map)
- The file the game loads for a map, made by the map compiler from the editor's
.mapfile. It carries a copy of the textures the map uses (see Textures from Maps). - Map file (
.map) - The text file your level editor saves: the map's brushes with the name of the texture on each face, and the list of WADs it uses (see Comparing with Maps).
- Hammer map (
.rmf) - The file Hammer (Worldcraft) and J.A.C.K. save for Half-Life: like a
.map, but binary and without the list of WADs. Runekeeper reads the names of its textures to compare them with a WAD (see Comparing with Maps). - Game folder
- The folder Runekeeper searches, with its subfolders, for the WADs a map lists when they aren't next to the map or in the folders above it: usually your Quake or Hexen II folder. Set in Settings ▸ Maps (see A Map's WADs).
- Lump
- One item inside a WAD, such as a texture, a picture or the palette.
- Surface type
- How the game draws a texture, decided by its name: solid, liquid, sky, animated or transparent (see Names and Surface Types). The inspector's Surface row and the list's Surface column show it, and the sidebar's categories group textures by it, next to groups such as Needs Attention or Used.
- Miptex
- A texture as Quake, Hexen II and Half-Life store it: a name, a size and the pixels in four mip levels; in Half-Life also its own 256 colors.
- Mipmap / mip level
- Smaller copies of a texture, at half, a quarter and an eighth of the original size. The game uses them for distant surfaces, which reduces flickering and is faster to draw. Runekeeper creates them automatically when you import an image.
- Palette
- The 256 colors a game can show; Quake and Hexen II each have their own, and in Half-Life every texture brings its own. Every pixel of a texture is one of these colors, which is why imported images are converted.
- Fullbright
- The last 32 colors of the Quake palette always appear at full brightness, even in complete darkness. They are meant for lights, lava and screens. Used by accident, they look like glowing specks. Hexen II and Half-Life have no such colors.
- Gamma
- A curve that brightens the dark tones of an image more than the light ones and keeps white white. The games' brightness setting is a gamma: 1.00 shows the real colors, lower values are brighter. Runekeeper uses the same curve for a WAD's gamma, the light preview and contact sheets.
- Source port, modern engine
- An engine that plays Quake or Hexen II today, such as QuakeSpasm, vkQuake, Ironwail or Hammer of Thyrion, built from the games' released source code. They light textures smoothly and can draw liquids translucent, where the original games lit in 64 steps and drew liquids opaque; the light preview and Alpha show both.
- Translucent (alpha)
- Drawn partly see-through, so what is behind shows through. Modern engines can draw liquids translucent at a strength, the alpha, that the engine or the map sets; Hexen II draws two of its liquids that way always. Quick Look's Background shows it, with its Alpha. Not the same as a transparent texture, whose see-through pixels aren't drawn at all.
- Dithering
- Mixing neighboring pixels of different colors to suggest a color that isn't in the palette.
Support
Troubleshooting
macOS says Runekeeper can't be opened
The download is probably damaged: delete it and download it again (see Installing and First Launch). A very old copy (before 0.3.1) isn't signed by Apple; download the current version instead.
A .wad file doesn't open
Other games use the .wad extension too. Doom WADs, for example, contain levels and sounds rather than textures. Runekeeper checks what is inside the file and explains when it is not a texture WAD of Quake, Hexen II or Half-Life.
The colors look wrong
Runekeeper decided on the wrong game for the WAD. Click the game at the bottom of the sidebar, or choose View ▸ Game, and pick the other one; the file itself doesn't change (see Quake, Hexen II and Half-Life).
The Finder shows the document icon instead of textures
Runekeeper has to be in your Applications folder and opened once. Then check that its Quick Look extension is on in System Settings ▸ General ▸ Login Items & Extensions. A WAD with nothing to show, such as gfx.wad or one with only skies, keeps the document icon (see WADs in the Finder).
A PNG's transparent parts came in black
Transparent areas stay see-through only in a transparent texture: turn on Make transparent areas see-through in the import sheet, which also gives the name its leading {. Areas that are less than half transparent become solid either way. Hexen II has no transparent textures, so in its WADs they are always filled with black (see Importing Images and Transparent Textures).
A map opens in the wrong app
Runekeeper opens .map files with the app the Finder uses for them if that app is a level editor; otherwise it asks once which app to use. To use another editor, choose it in Settings ▸ Maps ▸ Level editor; Automatic goes back to the Finder's choice (see Comparing with Maps).
A texture doesn't show up in my level editor
Look under Needs Attention in the sidebar. A wrong size or an invalid or duplicate name is the most common cause. Also make sure you saved the WAD and that the editor has reloaded it.
Getting Help on Discord
Found a problem, have a question or an idea for Runekeeper? Join the Runekeeper Discord server for discussion with other mappers, and ask for help in its #support channel.
When reporting a problem, please mention your Runekeeper version (Runekeeper ▸ About Runekeeper) and your macOS version, and describe what you did, what you expected and what happened instead. If it's about a particular WAD file and you may share it, attach it.
If Runekeeper Quits Unexpectedly
Describe what happened in #support. macOS also keeps a crash report that helps a lot in finding the cause, but please don't post it in a channel: it contains identifiers of your Mac and can contain names of your folders and files. If the report is needed, you'll be asked for it and can send it by direct message. Runekeeper never sends anything by itself.
To find the crash report:
- Open the Console app (in Applications ▸ Utilities).
- Click Crash Reports in the sidebar and select the newest entry starting with Runekeeper.
- Control-click or right-click it and choose Reveal in Finder.
The reports are also in the folder ~/Library/Logs/DiagnosticReports, named Runekeeper- followed by a date. They are plain text, so you can open one in TextEdit and see what it contains before you send it.
Contact
For questions and problems, please use Discord, so others can benefit from the answers too. For anything else, write to runekeeper@leinich.io.
Who Runekeeper owes thanks to, and the licenses of what it includes, are in Licenses & Acknowledgements (also Help ▸ Licenses & Acknowledgements).